3. Make your own paper
devised by John Malam
Follow these step-by-step instructions to make your own paper. It's an easy classroom activity which can be carried out over two or three days. You could plan to make many sheets and build them into a class book linked to your World Book Day or Children's Book Week events.
Here's what you'll need:
- Sheets of newspaper
- Mixing bowls
- Potato masher or a hand-held food blender
- Wire coathanger or garden wire
- Pair of tights
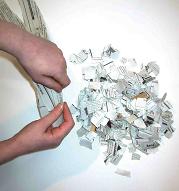
1. Tear sheets of newspaper into lots of small pieces. |
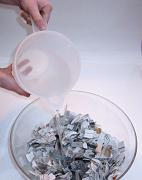
2. Put the pieces into a bowl. Cover with lots of water. Leave to soak over night. |
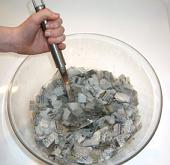
3. Mash the soaked paper with a potato masher (very slow method). Or give them a quick whizz with a food blender (best fast method). |
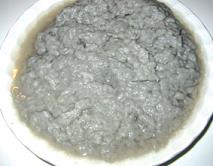
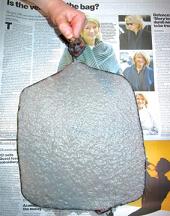
4. The mashed-up paper should look like thick grey porridge. This is your paper pulp. |
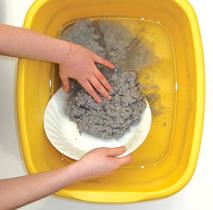
5. Add the pulp to a bowl of water. The mixture should look like thick soup – not too runny. |
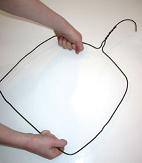
6. Bend a wire coathanger into the shape you want your paper to be. It has to be able to fit into the bowl you've used in step 5. |
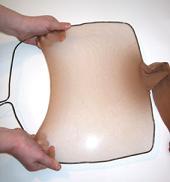
7. Stretch one leg of a pair of tights over the coathanger. Stretch as much as you can. Attach to the coathanger handle. |

8. Give the paper pulp a good stir. Lower the coathanger frame into the water. Keep it level. Cover with a thin layer of pulp. Lift out. |
9. Place the frame on sheets of newspaper to dry (takes a few days). Or put it on a tray in an airing cupboard (faster method). |
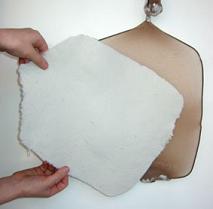
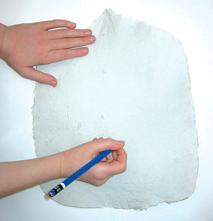
10. When dry, carefully peel the paper from the frame. |
11. Your paper is ready to use. |
Try this: For coloured or textured paper, add food colouring, leaves, chopped grass or petals to the pulp mixture at step 5. |

|
|
|

|
|
|
||